Cuộc chạy đua Tên Lữa Nước Giữa Các Trường

teddybear2211

New Member
Ðề: Cuộc chạy đua Tên Lữa Nước Giữa Các Trường

oh... thế nhóm anh đứng ra tổ chức thi thế? free hay đóng phí đấy?
 

teddybear2211

New Member
Ðề: Cuộc chạy đua Tên Lữa Nước Giữa Các Trường

hihi... thế à... :) ... thế chỉ có thi thôi mừ hem có ăn uống gì hít à... :) ...
 

teddybear2211

New Member
Ðề: Cuộc chạy đua Tên Lữa Nước Giữa Các Trường

ô... ra là thía... chỉ có tới thi xong òi zìa ... mà 1 người thi mất bao lâu?
 

huynh_ngoc_long

New Member
Ðề: Cuộc chạy đua Tên Lữa Nước Giữa Các Trường

Báo cáo lại tình hình hồi sáng:
Phóng thử kiểu tên lửa mới -> hỏng (sau 1 lần phóng) ... Nhưng có khả thi vì lý do kỹ thuật chuẩn bị chưa kỹ. => nhận xét và cải tiến mời bạn Hoàng vào cho ý kiến

Tên lửa kiểu cũ dùng pittong : lần phóng thứ nhất hoạt động nhưng trong lúc tên lửa chuyển quỷ đạo bay cắm xuống (chưa chạm đất) thành công 1 nữa. Lần 2, bơm áp suất wá mạng, bay mất pittong. Lần 3, cắm xuống chạm đất rồi mới bung. Lần 4, áp suất wá mạnh, bung luôn ống dẫn với pittong. -> Có khả thi, cần cải tiến lại chổ pittong để khg bị xì nữa.

Cải tiến dàn phóng kiểu mới: Sau 3 lần phóng thử, khg bị rò rỉ nước khi áp suất cao. Nhưng tên lửa không thể bay lên đc... vì wá nặng phần dưới... -> Không khả thi cho lắm, cần xem xét và thử lại
Phòng tách tầng theo kiểu dùng lực cản không khí: lần 1,2, lực cản không đủ...tên lửa không tách tầng....Lần 3, thay đổi lại, tên lửa tách tầng thành công. Lần 4, tên lửa không kịp bay, tầng trên bay trước. Lần 5, tên lửa không tách tầng thành công -> Loai này làm chơi thui...Khg có ý định nghiên cứu sâu
 

huynh_ngoc_long

New Member
Ðề: Cuộc chạy đua Tên Lữa Nước Giữa Các Trường

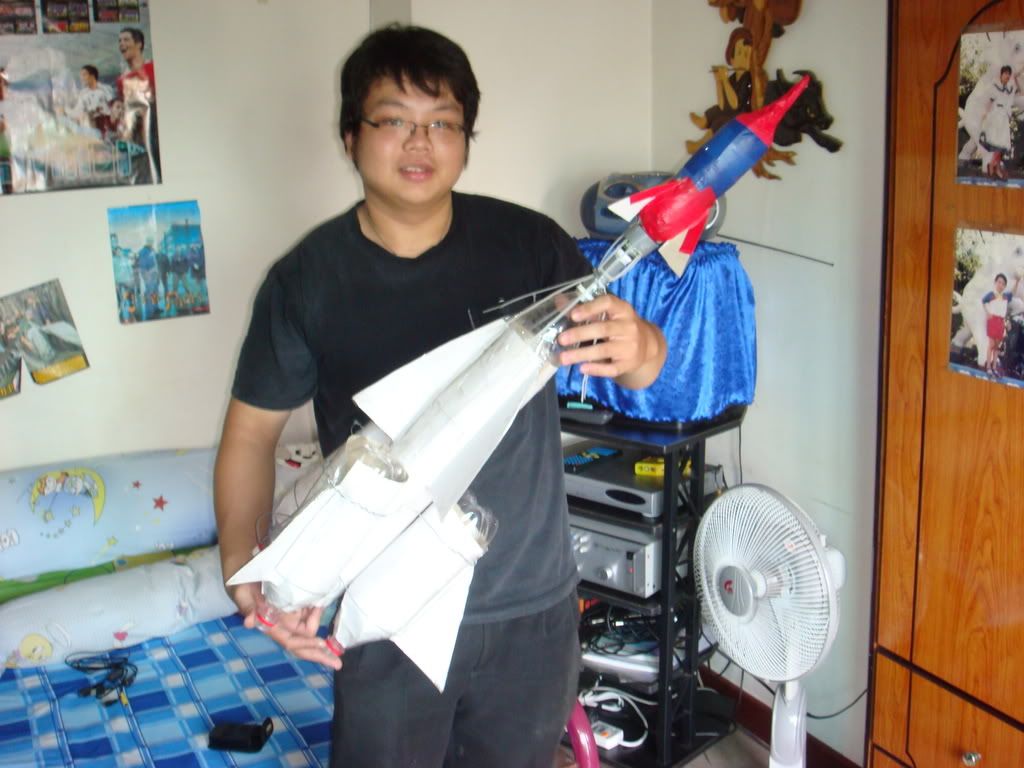
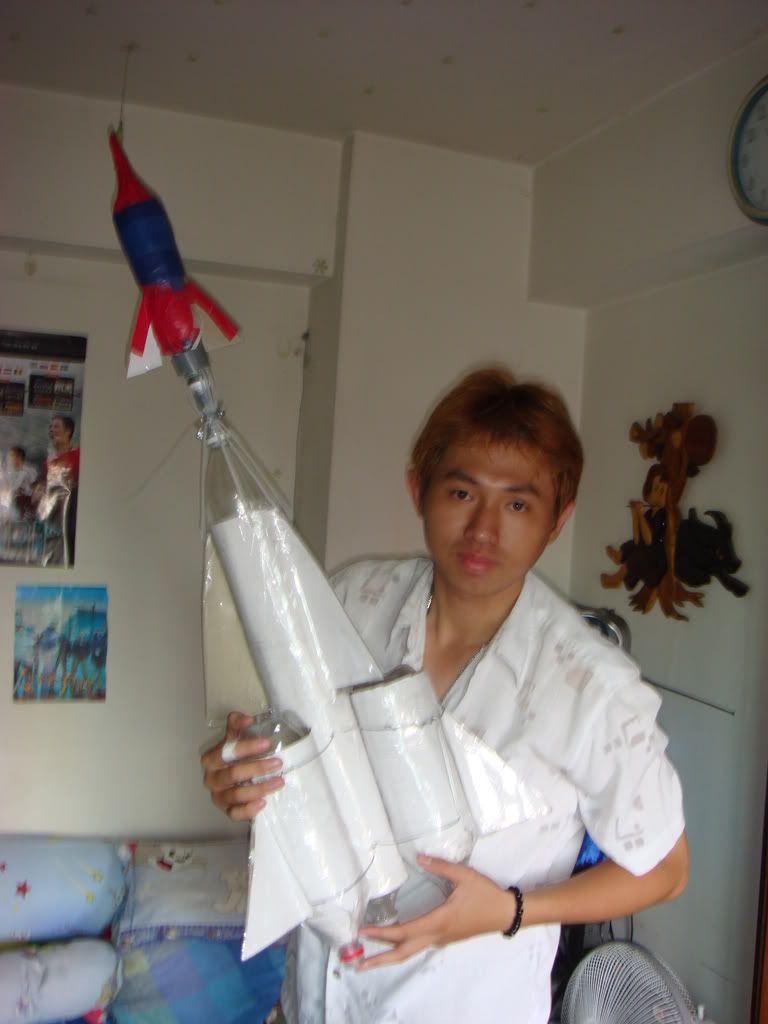
tên lửa tách tầng đây...
Hoàng
wol_error.gif
Ảnh này đã được làm nhỏ lại. Bấm vào đây để xem kích thước thật 768x1024.
DSC01480.jpg

long
wol_error.gif
Ảnh này đã được làm nhỏ lại. Bấm vào đây để xem kích thước thật 1024x768.
DSC01479.jpg
 

huynh_ngoc_long

New Member
Ðề: Cuộc chạy đua Tên Lữa Nước Giữa Các Trường

Cải tiến thanh phóng

Installing O-rings on PVC tubing


Introduction
Cutting the channels for o-rings is one of those things that always seems to be glossed over in water rocket guides. One moment they mention cutting the grooves, the next *POOF*, the groove is cut and they’re talking about some entirely different part. For those who might be reading this section out of any sort of context, what I’m basically talking about is (to me) the single most important component in a water rocket launcher...the o-ring and channels.​
The Basics
The o-rings work by smashing between the neck of the bottle (water rocket) and the launch rod. By contacting both the launch rod and the bottle’s neck the entire way around, there is no way for air to get in, or more importantly, OUT of the system, except through the launcher rod.
o-ringexample.jpg

o-ring example​
Getting Started
First things first, half inch PVC. You need to get some. Any store in America (and probably everywhere else on the planet) with a large plumbing section will have some half inch, schedule 40, PVC tubing. If you can’t get that, you can usually substitute half inch, rigid, plastic sprinkler tubing.
pipe.jpg
Next, you’ll need to mark the place you’ll be putting the o-ring. The marks will need to about 1.5 (37mm) inches from the end of the PVC tubing. Why? Because almost an inch (25mm) of the PVC will be inside a coupler on that end. To make the marks, I usually just wrap a strip of paper (with one straight side) around the tube. Make one mark, slide the paper down about 1/8 of an inch (about 3mm) and make another.
Cutting
Now, you’ll need to cut shallow grooves along the lines you just drew, using a hack saw. Remember, you’re NOT trying to cut the tubing off. If you cut through to the center at any point, you need to cut the tube off and start over.
Filing
After making those initial cuts you get to the annoying part. Using a 1/8 inch (approximate) thick mill file, remove the ridge that remains between the two cuts. When you’re done, you should have a single, rectangular channel running all the way around the tubing.
Now it’s time for the initial fitting of the o-ring. I usually use a number 10 o-ring. Slide it over the end of the tubing and roll it down until it slips into the channel. Check the o-ring to see if there are any high spots in the channel. You will either see that the o-ring is obviously sticking out more at that point in the channel or you can run your finger along the edge of the o-ring and feel the higher spots. It would probably be best to make a mark on the tubing beside any of these high spots. You may even want to vary the length, width or make additional marks to indicate spots that may be in worse shape than others.

no bulge
bulging
bulge area marked​
Remove the o-ring and file down the bad spots. It will probably be difficult to remove the ring. You might want to bend the tip of a paperclip with a pair of pliers. This simple little tool can be inserted beside the o-ring and slid underneath to pry it out. Once one part is out it is relatively easy to roll the rest of the ring out of the groove. At this point (and later) filing technique becomes more important. Use a slow, arching motion across the tubing so you never spend too much time in one area. This helps to prevent too much being removed from one spot.
Finishing up
Having leveled out the bottom of the channel it’s time to check it to make sure the whole assembly actually fits inside a bottle. Slide the o-ring back on and grease it up using something like say...petroleum jelly. It should take very firm pressure to get the o-ring into the neck of the bottle. If the o-ring won’t fit into the bottle you’ll need to remove the o-ring again and file a small amount of material away from the channel all the way around. Another option is to try a smaller (either one that’s not as wide, which will make it stretch, or just one that’s thinner in general). Repeat this testing, trimming and leveling process until the o-ring fits into the neck of the bottle. If you end up cutting to the center of the tube, it’s an indication that the o-ring you were using was probably too thick.
...and here's end result
finished.jpg


(nguồn: http://images.google.com.vn/imgres?i...icial%26sa%3DN)
 
Top